

Foundations
Strip Foundation
What a strip foundation is and how to build one: marking out, the cushion, formwork, reinforcement, waterproofing, pouring concrete and removing the formwork.

Many people building a home choose a monolithic strip foundation, because it is widely used. What is a strip foundation and how do you make one on your own plot?
A strip foundation is a type of monolithic foundation — a band of reinforced concrete running under all the load-bearing walls of the house.
Whether a strip foundation can be used, and its depth, depend on the soils, the groundwater level and the depth of seasonal ground freezing. On frost-heaving soils, measures provided for in the design may be needed, or a different type of foundation. The type of foundation is chosen on the basis of site investigations and the design.
Main advantages. A strip foundation provides continuous support under the load-bearing walls and can be used in houses with a basement, given appropriate design.
Main disadvantages: high cost, installation takes a great deal of time, and building this kind of foundation depends on weather conditions and requires protecting the concrete at low temperatures.
The embedment depth of a strip foundation (the distance from the planned ground level to the base of the foundation) and the height of the strip itself are different quantities. The embedment depth is determined by the design, taking into account the soils, the groundwater level, the depth of seasonal ground freezing and the construction of the house, including whether there is a basement.
If the house is to have an underground space, a basement or a lower ground floor, a strip foundation is one of the suitable options.
A strip foundation can be built by hand or with the help of construction machinery.
How to build a strip foundation yourself
1. Mark out the position of the strip foundation on the plot
Mark the locations of the outer corners of the walls and drive rebar into them.
Then stretch a strong cord, fishing line or thin wire between the rebar.
Digging starts from the lowest point of the plot.

The soil can be dug by hand, or you can hire machinery to dig the trench for pouring the foundation.
2. Make the foundation cushion
The cushion is meant to soften and evenly distribute the load. It is made of sand.

3. Build the formwork for the strip foundation

4. Reinforce the strip foundation
The rebar is fastened with tie wire or by welding.

5. Make openings for utilities and ventilation
Keep in mind that ventilation openings are located above ground level and sewer openings below it.

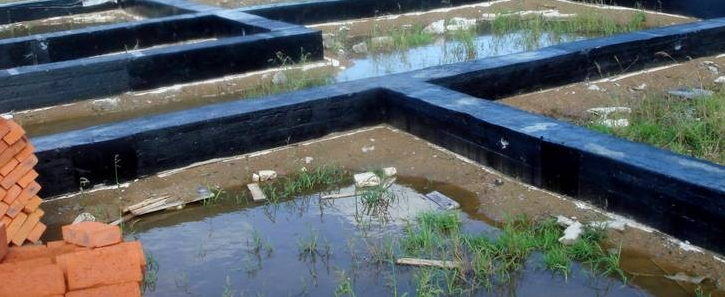
6. Waterproof the strip foundation
The materials and the waterproofing work are chosen by the design, taking into account groundwater and operating conditions.
7. Pour the concrete
The class of concrete and the requirements for it (including, where needed, frost resistance and water impermeability) are determined by the design. The concrete mix can be prepared on site or ordered ready-made from a plant; the choice affects cost and quality control.
Concrete mix that has lost its workability or has begun to set should not be diluted with water: this changes the water–cement ratio set in the concrete mix design. The workability of the mix and the permitted ways of adjusting it are determined by the design and the technological regulations, and when ready-mixed concrete is delivered they are agreed with the producer.

8. Remove the formwork
The formwork is removed once the concrete has reached strength sufficient for the structure and conditions in question, as specified in the design and the technological regulations. For the vertical side faces of the strip, it is important that the shape and surface of the concrete are not damaged when the formwork is removed. The time needed to gain strength depends on the concrete mix, temperature and humidity; the foundation may be loaded with walls only after reaching the strength specified in the design.

Mistakes
Concreting and the hardening of concrete depend on weather conditions, not on the date in the calendar. In low temperatures, frost, heat, rain or wind, measures provided for by the design and the technology are needed, for example protecting fresh concrete from freezing and from drying out. Placing the mix and caring for the concrete in the first days are different tasks: the mix must be placed and compacted, and then conditions for hardening must be ensured.
If you decide to save money on any of these steps, remember that in the end you are quite likely to get a foundation of poor quality. A small crack in the foundation, a "sandy" foundation, will soon lead to settlement and a crack in the house. Repairing such defects can be difficult and expensive.
So hire knowledgeable specialists, or even better, turn to a construction company that provides legal guarantees for its work and has a good reputation.
The choice is yours!
For other foundation options for a straw-panel house, see the overview: Foundation for a Straw-Panel House.
NEXT STEP
Planning a healthy, energy-efficient home?
Tell us about your site, your ideas and the home you want to build. We will help you identify the right next step.